CommandLine
US.FreeWill.CommandLine is the simplest and most straight-forward way for you
to implement a command line interface in ANY app, including Console, ASP.Net MVC,
WebForms, WinForms, Telnet, Mobile apps or any other type of app you can think of.
CommandLine is a NuGet package you can install into your .Net applications and begin
processing command lines right away with extraordinarily little effort.
You will not find an easier to use command line library for .Net.
Would you rather just see the Quick Start? Quick Start »
Get the source on
Install from

bc1q5fdnm656j2rc200c85x2q6u0cu85v7hnwl3c7q
Each tab below is a seaparate Quick-Start guide for different types of applications.
CommandLine
CommandLine is a .Net class library that makes writing command line interfaces simple. Benefits include:
- Turning your CLI into an event-driven application.
- ZERO parsing needed on the application developer's effort.
- A HELP command is automatically added and automatically shows your help text for each command and each parameter in a nicely formatted mannor.
- An included EXIT command is provided, by default, which you can, of course, override with your own as well as choosing what word triggers the exit command.
- Can add CLI to any type of user interface app, including WinForms, Web apps, etc. (examples are included).
- Command history, for free, with up and down arrows hit by the user.
How to use:
- Install the us.FreeWill.CommandLine NuGet package from the Visual Studio Nuget package manager.
- Instantiate a CommandLineType object.
- Instantiate 1 or more CommandType objects and add them to the CommandLineType object.
- Instantiate 0 or more ParameterType objects for each CommandType object and add them to the appropriate CommandType objects.
- Call the CommandLine object's Execute() method or it's ExecDosCommand(args) method.

or from NuGet.org
How to donate:
BitCoin: bc1q5fdnm656j2rc200c85x2q6u0cu85v7hnwl3c7q
Example usage:
using us.FreeWill.CommandLine;

namespace ComandLine.Example.Console
{
    class Program
    {
        private static CommandLineType _cl;

        static void Main(string[] args)
        {
            //Instantiate the command line object, giving the initial display prompt.
            _cl = new CommandLineType("Example", ">");

            //Instantiate a command object, along with some simple help text and a reference to the command's callback function.
            var testCommand = new CommandType(
                commandEventHandler: TestCommand_CommandFunction,
                consoleEntry       : "test",
                shortHelpString    : "Just a sample command.");

            //Add a parameter that can be used.
            var parm = new ParameterType(
                eventHandler    : Parm_ValidateFunction,
                parmLabel       : "SomeParm",
                equationString  : "=", //What you expecte between the parm name and value (SomeParm = Hello).
                defaultUserValue: "Hello",
                shortHelpString : "A sample command parameter that defaults to value \"Hello\".");

            //Add a parameter that can be used.
            var parm2 = new ParameterType(
                eventHandler    : Parm_ValidateFunction,
                parmLabel       : "SomethingElse",
                equationString  : "=", //What you expecte between the parm name and value (SomethingElse = World).
                defaultUserValue: "World",
                shortHelpString : "A sample command parameter that defaults to value \"World\".");

            testCommand.ParameterList.Add(parm);
            testCommand.ParameterList.Add(parm2);

            //Add the command to the command line object so it can process it when users enter it.
            _cl.AddCommand(testCommand);

            //Tell it which of your commands exits the program (you can add extra functionality to the exit process here).
            //Comment out the next line and you'll get the custom exit command instead, along with its default help.
            _cl.SetExitCommand(new CommandType((NotifyEventDelegate)null, "Quit", "My custom exit command."));

            if (args.Length > 0)
            {
                //If launched from the OS console (or anywhere else) with parms passed in,
                //execute the one command and exit.
                _cl.ExecDosCommand(args);
            }
            else
            {
                DisplayWelcome(_cl);

                //Start up the command line.  It won't stop until someone enters the text you provided
                //  for the exit command OR if you provided no exit command, when the user types the
                //  text for the default exit command, which is "Exit".
                _cl.Execute();
            }
        }

        //Automatically called when parm or parm2 are used.
        //Their values are validated and processed here.
        private static bool Parm_ValidateFunction(object sender)
        {
            var parm = (ParameterType) sender;
            _cl.OutputStream.WriteLine($"Parameter recognized \"{parm.ParamText}\" with value \"{parm.UserValue}\".");

            //Do something special here.
            if (parm.UserValue.ToLower() == "fail")
                return false; //We don't like the value sent.

            //We like the values provided.  Return true.
            return true;
        }

        /// <summary>
        /// The event handler for the Test command.  This will be called automatically when the user enters the "test" command.
        /// You write the code to handle the "Test" command here.
        /// </summary>
        /// <param name="sender">The sending CommandType object.</param>
        /// <returns>You return true or false depending on whether you determined this succeeded or failed.</returns>
        private static bool TestCommand_CommandFunction(object sender)
        {
            var command = (CommandType) sender;

            var cl = command.GetOwnerCommandLine();
            //We don't write to Console. We write to the command line object's OutputStream.
            //  We can redirect THAT to Console, if we like, or anywhere else.
            cl.OutputStream.WriteLine($"You entered [{command.ConsoleEntry}]");

            if (command.ConsoleEntry.Contains("fail"))
                return false;

            return true;
        }

        private static void DisplayWelcome(CommandLineType cl)
        {
            //Write a little intro for the users on startup...
            //Notice your CommandLineType object has an output stream.  You should always use this
            //instead of Console.WriteLine because you can change OutputStream to any stream you want.
            //CL defaults to the System.Console.Out TextWriter, but you can change it ot anything you want.

            cl.OutputStream.WriteLine("*******************************************************************");
            cl.OutputStream.WriteLine("*                                                                 *");
            cl.OutputStream.WriteLine("*  #     #           ##                                       ##  *");
            cl.OutputStream.WriteLine("*  #     #            #                                       ##  *");
            cl.OutputStream.WriteLine("*  #     #            #                                       ##  *");
            cl.OutputStream.WriteLine("*  #     #            #                                       ##  *");
            cl.OutputStream.WriteLine("*  #  #  #  #####     #     #####   #####  ### ##   #####     ##  *");
            cl.OutputStream.WriteLine("*  # ### # #     #    #    #     # #     # ## #  # #     #    ##  *");
            cl.OutputStream.WriteLine("*  ### ### #######    #    #       #     # #  #  # #######    ##  *");
            cl.OutputStream.WriteLine("*  ##   ## #          #    #     # #     # #  #  # #              *");
            cl.OutputStream.WriteLine("*  #     #  #####    ###    #####   #####  #     #  #####     ##  *");
            cl.OutputStream.WriteLine("*                                                                 *");
            cl.OutputStream.WriteLine("*******************************************************************\r\n");

            cl.OutputStream.WriteLine("Welcome to the CommandLine sample Console application.");
            cl.OutputStream.WriteLine("Type \"Help\".");
        }
    }
}
The above program produces the following output when the user types "HELP" at the command line. The default help facility takes the help text provided by the app developer and displays it in a cleanly formatted fasion:
*******************************************************************
*                                                                 *
*  #     #           ##                                       ##  *
*  #     #            #                                       ##  *
*  #     #            #                                       ##  *
*  #     #            #                                       ##  *
*  #  #  #  #####     #     #####   #####  ### ##   #####     ##  *
*  # ### # #     #    #    #     # #     # ## #  # #     #    ##  *
*  ### ### #######    #    #       #     # #  #  # #######    ##  *
*  ##   ## #          #    #     # #     # #  #  # #              *
*  #     #  #####    ###    #####   #####  #     #  #####     ##  *
*                                                                 *
*******************************************************************

Welcome to the CommandLine sample Console application.
Type "Help".

Example>help


    Commands    Help Summary
    ----------- ----------------------------------------------------------------
    HELP        Displays all commands and a short description of what they do.

    TEST        Just a sample command.

                    SOMEPARM     [=] A sample command parameter that defaults to value "Hello".
                    SOMETHINGELSE[=] A sample command parameter that defaults to value "World".

    QUIT        My custom exit command.

    Usage: command parm1 = setting1 parm2 = setting2


Example>_
User enters the "test" command:
Example>test

You entered [test]
User enters the "test" command with the "somethingelse" parameter:
Example>test someparm = hello

Parameter recognized "SOMEPARM" with value "hello".
You entered [test]
User enters the "test" command with the "somethingelse" parameter:
Example>test somethingelse = world!

Parameter recognized "SOMETHINGELSE" with value "world!".
You entered [test]
User enters both parameters with the "test" command:
Example>test someparm = hello somethingelse = world!

Parameter recognized "SOMEPARM" with value "hello".
Parameter recognized "SOMETHINGELSE" with value "world!".
You entered [test]
Parameters can be provided in any order. Here's the user entering the same two parameters from the "test" command in a different order:
Example>test somethingelse = world! someparm = hello

Parameter recognized "SOMETHINGELSE" with value "world!".
Parameter recognized "SOMEPARM" with value "hello".
You entered [test]
The CommandLine library handles unrecognized user commands:
Example>not a command


    Unrecognized Command.  Valid Commands are:
------------------------------------------

    HELP        Displays all commands and a short description of what they do.

    TEST        Just a sample command.

                    SOMEPARM     [=] A sample command parameter that defaults to value "Hello".
                    SOMETHINGELSE[=] A sample command parameter that defaults to value "World".

    QUIT        My custom exit command.

    Usage: command parm1 = setting1 parm2 = setting2
If you're using the CommandLine library in a Console app, you get command history for free too by hitting the up or down arrows.
History
I created this out of need back in 1998, when I was writing an unusually large amount of command line programs. It was originally written in C++, then downgraded to C (stupid work requirements!), then upgraded to C# around 2003. It was last touched around 2007. Sometime between then and 2018, I lost the source code, but still had the latest binary. Fortunately, .Net binaries can be decompiled back into C# code. From that, I cleaned it up and modernized it. I also added plenty of comments and documentation, sample applications, and a Nuget package, polishing it up before publishing it in 2019 (21 years after it's original creation).
In your console's Program.cs file:
- Instantiate a CommandLineType object.
- In your Main() method, add ParameterType objects to it.
- Add parameter validation event handlers to the parameter objects.
- Add command event handlers to the command objects.
- Optionally, (not CommandLine library related), have an initial display method to great your users upon app start.
class Program
{
    //The main command line object.
    private static CommandLineType _cl;

    static void Main(string[] args) {...}

    private static bool Parm_ValidateFunction(object sender) {...}

    /// <summary>
    /// The event handler for the Test command.  This will be called automatically when the user enters the "test" command.
    /// You write the code to handle the "Test" command here.
    /// </summary>
    /// <param name="sender">The sending CommandType object.</param>
    /// <returns>You return true or false depending on whether you determined this succeeded or failed.</returns>
    private static bool TestCommand_CommandFunction(object sender) {...}

    private static void DisplayWelcome(CommandLineType cl) {...}

}
In your Main() method:
- Initialize your Program class's CommandLineType object with the type of prompt you want it to display.
- Create a new CommandType object for each possible command your program supports.
- For each command object, add ParameterType objects for each parameter your commands take.
- Commands and Parameters have event handlers to handle the execution of the commands and validation of the parameters.
- Don't forget to provide help text for each command and each parameter. The CommandLine library automatically handles the "Help" command and displays YOUR help text.
- The CommandLineType already supports an Exit command, but feel free to add your own to handle exiting the way you need to.
- After it's all set up, call your command object's ExecDosCommand() method, passing it the args array sent into the Main() method.
- If there were to args passed in, then just call your command object's Execute() method to get it started.
This is the LONG version. See the "Short Version" tab for how short your code would be in real life. In this long version, I've added plenty of comments to clarify what's going on and expanded out the formatting for readability and named every parameter, again, for readability. I don't want you having any confusion while learning this simple library. Once you understand what's going on here, click on the "Short Version" tab to see how small it really is in real life coding.
static void Main(string[] args)
{
    //Instantiate the command line object, giving the initial display prompt.
    _cl = new CommandLineType("Example", ">");

    //Instantiate a command object, along with some simple help text and a reference to the command's callback function.
    var testCommand = new CommandType(
        commandEventHandler: TestCommand_CommandFunction,
        consoleEntry       : "test",
        shortHelpString    : "Just a sample command.");

    //Add a parameter that can be used.
    var parm = new ParameterType(
        eventHandler    : Parm_ValidateFunction,
        parmLabel       : "SomeParm",
        equationString  : "=", //What you expecte between the parm name and value (SomeParm = Hello).
        defaultUserValue: "Hello",
        shortHelpString : "A sample command parameter that defaults to value \"Hello\".");

    //Add a parameter that can be used.
    var parm2 = new ParameterType(
        eventHandler    : Parm_ValidateFunction,
        parmLabel       : "SomethingElse",
        equationString  : "=", //What you expecte between the parm name and value (SomethingElse = World).
        defaultUserValue: "World",
        shortHelpString : "A sample command parameter that defaults to value \"World\".");

    testCommand.ParameterList.Add(parm);
    testCommand.ParameterList.Add(parm2);

    //Add the command to the command line object so it can process it when users enter it.
    _cl.AddCommand(testCommand);

    //Tell it which of your commands exits the program (you can add extra functionality to the exit process here).
    //Comment out the next line and you'll get the custom exit command instead, along with its default help.
    _cl.SetExitCommand(new CommandType((NotifyEventDelegate)null, "Quit", "My custom exit command."));

    if (args.Length > 0)
    {
        //If launched from the OS console (or anywhere else) with parms passed in,
        //execute the one command and exit.
        _cl.ExecDosCommand(args);
    }
    else
    {
        DisplayWelcome(_cl);

        //Start up the command line.  It won't stop until someone enters the text you provided
        //  for the exit command OR if you provided no exit command, when the user types the
        //  text for the default exit command, which is "Exit".
        _cl.Execute();
    }
}
This is the short version that is the EXACT same code as the "long" version in the "Long Version" tab, minus all the comments and extra formatting intended to make it readable to a beginner of the library. This short version is more or less what real-world code would look like. I thought it was important to point this out, so you can see how little effort it is now to have as many commands and parameters as you like with ZERO effort in trying to parse them yourself. That should be basic functionality provided in modern day frameworks. Sadly, it still is not, so it was necessary to create this.
static void Main(string[] args)
{
    _cl = new CommandLineType("Example", ">");

    var testCommand = new CommandType(TestCommand_CommandFunction, "test", "Just a sample command.");
    testCommand.ParameterList.Add(new ParameterType(Parm_ValidateFunction, "SomeParm", "=", "Hello", "A sample command parameter that defaults to value \"Hello\"."));
    testCommand.ParameterList.Add(new ParameterType(Parm_ValidateFunction, "SomethingElse", "=", "World", "A sample command parameter that defaults to value \"World\"."));

    _cl.AddCommand(testCommand);
    _cl.SetExitCommand(new CommandType((NotifyEventDelegate)null, "Quit", "My custom exit command."));

    if (args.Length > 0)
        _cl.ExecDosCommand(args);
    else
    {
        DisplayWelcome(_cl);
        _cl.Execute();
    }
}
private static void DisplayWelcome(CommandLineType cl)
{
    //Write a little intro for the users on startup...
    //Notice your CommandLineType object has an output stream.  You should always use this
    //instead of Console.WriteLine because you can change OutputStream to any stream you want.
    //CL defaults to the System.Console.Out TextWriter, but you can change it ot anything you want.

    cl.OutputStream.WriteLine("*******************************************************************");
    cl.OutputStream.WriteLine("*                                                                 *");
    cl.OutputStream.WriteLine("*  #     #           ##                                       ##  *");
    cl.OutputStream.WriteLine("*  #     #            #                                       ##  *");
    cl.OutputStream.WriteLine("*  #     #            #                                       ##  *");
    cl.OutputStream.WriteLine("*  #     #            #                                       ##  *");
    cl.OutputStream.WriteLine("*  #  #  #  #####     #     #####   #####  ### ##   #####     ##  *");
    cl.OutputStream.WriteLine("*  # ### # #     #    #    #     # #     # ## #  # #     #    ##  *");
    cl.OutputStream.WriteLine("*  ### ### #######    #    #       #     # #  #  # #######    ##  *");
    cl.OutputStream.WriteLine("*  ##   ## #          #    #     # #     # #  #  # #              *");
    cl.OutputStream.WriteLine("*  #     #  #####    ###    #####   #####  #     #  #####     ##  *");
    cl.OutputStream.WriteLine("*                                                                 *");
    cl.OutputStream.WriteLine("*******************************************************************\r\n");

    cl.OutputStream.WriteLine("Welcome to the CommandLine sample Console application.");
    cl.OutputStream.WriteLine("Type \"Help\".");
}
Add a validation function to each ParameterType object you add to your commands.
You can access the parameter name and the user provided value from the sender object.
Then you can analyze the values any way you see fit.
Return true if you're happy with it.
Return false to inform the CommandLine library that the parameter is invalid so it can properly handle the error condition.
In this example, it's displaying the name and value of the parameter (To the command line'
s output stream), then checking
to see if the user's value of the paremeter was entered as "fail", and if so, simulating
a failure by returning false. Otherwise, it returns true, for success. ANY type of
processing can happen here that you see fit.
private static bool Parm_ValidateFunction(object sender)
{
    var parm = (ParameterType) sender;
    _cl.OutputStream.WriteLine($"Parameter recognized \"{parm.ParamText}\" with value \"{parm.UserValue}\".");

    if (parm.UserValue.ToLower() == "fail")
        return false;

    return true;
}
Each command object you create needs an event handler. This is where the guts of your command functionality lie. When the user types that command, the proper event handler will automatically be called. You are sent the command object in the sender object in your event handler. By this time, the user provided parameters have already been validated. The command object has access to all the properties of the command the user typed, INCLUDING the parameter objects and all the values the user provided. Handle the execution of the command any way you see fit. Return true if everything went well (according to YOUR definition of "well"). Return false if you determined something wasn't right.
/// <summary>
/// The event handler for the Test command.  This will be called automatically when the user enters the "test" command.
/// You write the code to handle the "Test" command here.
/// </summary>
/// <param name="sender">The sending CommandType object.</param>
/// <returns>You return true or false depending on whether you determined this succeeded or failed.</returns>
private static bool TestCommand_CommandFunction(object sender)
{
    var command = (CommandType) sender;

    var cl = command.GetOwnerCommandLine();
    cl.OutputStream.WriteLine($"You entered [{command.ConsoleEntry}]");

    if (command.ConsoleEntry.Contains("fail"))
        return false;

    return true;
}
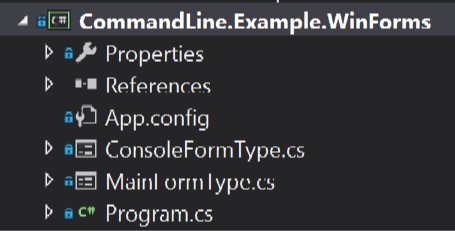
Command line interfaces can be utilized in WinForms applications too. Pictured to the left
is the solution tree of a simple WinForms application with 2 forms:
(Main Á Console).
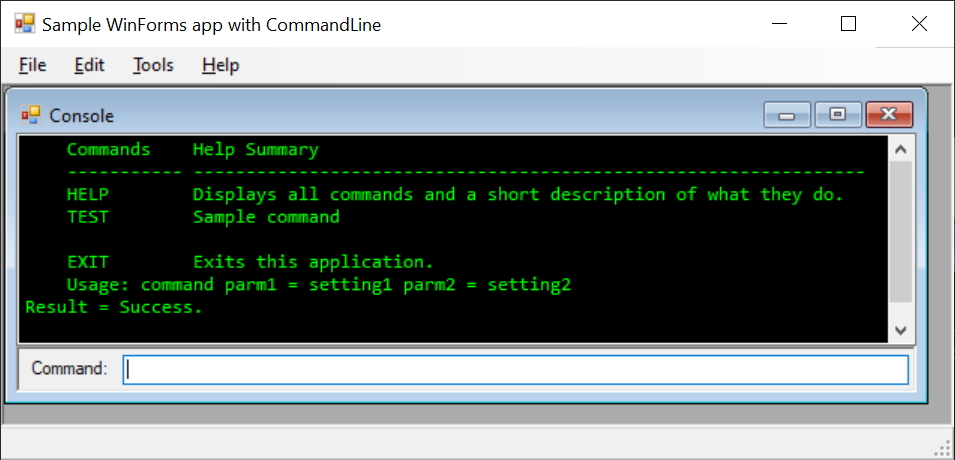
Pictured below is what the WinForm demo app looks like. The user can enter commands in the
Command: text entry. The results are redirected to the TextBox above it.
Unlike a console app, there is nothing added to the Program.cs file.
Instantiate the CommandLineType object and initialize it with a prompt.
private CL.CommandLineType _commandLine = new CL.CommandLineType("Example", ">");
On the event handler for the File->New Console menu, create a new child form to host the CLI:
private void File_NewConsoleToolStripMenuItem_Click(object sender, EventArgs e)
{
    //Create the Console window, passing it the command line object.
    //That's where the user will interact with the command line.
    var console = new ConsoleFormType(this._commandLine);
    console.Owner = this;
    console.MdiParent = this;
    console.Show();
}
On the Shown() event handler, add a command to the command line object and assign a StringWriter to the command line object's OutputStream. You'll use the OutputStream later to hook into the command line's output so you can display it in a TextBox control.
private void MainFormType_Shown(object sender, EventArgs e)
{
    //Add a sample command to the command line object and point it to its event handler and give it some help text.
    var testCommand = new CL.CommandType(TestCommand_CommandFunction, "Test", "Sample command");
    this._commandLine.AddCommand(testCommand);

    //Since we're not using the Console, we need to trap the output so we can do something with it.
    //A StringWriter will work just fine for this purpose.
    //Our ConsoleFormType window can capture the output and display it however it likes.
    this._commandLine.OutputStream = new StringWriter();

    //Notice there's no exit command?  That's not needed in a winforms app.
    //Whatever control is passing the input to the command line object can check for an exit command (if it wants to).
    //Also notice that we're NOT calling this._commandLine.Execute()?  Again, thats because we're NOT using an actual
    //Console app.  We're handling keyboard input from a standard TextBox control and CALLING CommandLineType.ExecCommand()
    //and passing it the text from our input textbox, so there's no concept of "exiting" the CommandLineType object.
}
The example command you added to the command line object in the MainFormType_Shown() event handler is defined here. When that command is executed by the user, this will be executed to handle it. This event handler does TWO things:
- Writes something to the command line's output stream. Notice we're not worried about WinForms controls?
- Displays a MessageBox. This is to demonstrate that just because activity was initiated by a command line, doesn't mean you're limited to ONLY command line activities. You can do anything you like.
/// <summary>
/// Event handler for the "test" command object.  This example purposely writes it here, in the MainForm,
/// rather than the ConsoleForm so that you can see that it doesn't need to know anything about the ConsoleForm
/// to output text to it.  It simply writes to the _commandLine.OutputStream.  The ConsoleForm will capture any
/// text written to that stream and display it however it likes.
/// </summary>
/// <param name="sender">The command object that owns the comment that was processed.</param>
/// <returns></returns>
private bool TestCommand_CommandFunction(object sender)
{
    var command = (CL.CommandType) sender;

    //Write to the command line's output.  It will be handled by the console form.
    _commandLine.OutputStream.WriteLine($"Test command executed [{command.ConsoleEntry}] and handled in the MainForm.");
    MessageBox.Show("This dialog box is being created from the MainForm and the command line is responding by doing something Windowy.  Command event handlers can do anything, not just command line like stuff.", $"You used the {command.ConsoleEntry} command.");

    return true;
}
The ConsoleForm is a child window where we'll be accepting user entered commands and displaying
the output.
Create a private field for a CommandLine object. The MainForm will pass an instance into the
constructor of this ConsoleForm. In our constructor, we'll accept it and assign it to our private
reference.
private readonly CommandLineType _commandLine;
The MainForm passes its single CommandLine object to us and we simpliy assign it to our local, private instance of it. The user can open as many ConsoleForm windows as they like. They'll all share the same instance of the CommandLine object.
public ConsoleFormType(CommandLineType commandLine)
{
    this._commandLine = commandLine;
    InitializeComponent();
}
We'll hook into our CommandTextBox's KeyPress event. We won't do anything special until the user
hits the [Enter] key. Once they do that, we'll ask the command line object to process the command
for us. We'll also check to see if the user entered the CommandLine object's Exit command and handle
the exit request. Then we'll capture the output from the CommandLine object's output stream and
display it in our OoutputTextBox.
Unlike an actual console application, where we call the CommandLine object's Execute() method, we're
working in a fundamentally different kind of environment in a WinForms application. This is an event
driving environment. So, instead of sending all processing the CommandLine.Execute() command, we
do slightly more work by watching out own user interface control and sending the user entered command
to the command line object's ExectCommand() method and manually check if they requested to exit.
private void CommandTextBox_KeyPress(object sender, KeyPressEventArgs e)
{
    //Check if user hit the enter key.  Handle ANY command here.
    //All we're doing is asking the command line to execute the
    //command, capturing the output, and checking if they want to exit.
    //We're NOT processing the commands.  That's the job of the CommandLineType.ExecCommand().
    if ((int) e.KeyChar == (int) us.FreeWill.SpecialKeysEnum.CR)
    {
        //Send the user entered command to the command line's ExecCommand() method to be processed.
        var commandResult = this._commandLine.ExecCommand(this.CommandTextBox.Text);

        //Check if the user entered whatever command triggered the exit event.
        if (commandResult == CommandResultEnum.Exit)
            this.Close(); //close this window if the user entered the exit command.

        //Capture the command's ouput and display in the OutputTextBox.
        this.OutputTextBox.Text += this._commandLine.OutputStream.ToString();

        //Reassign the OutputStream to a new StringWriter() (old one will not let go of old output).
        this._commandLine.OutputStream = new StringWriter();

        //Show whether or not the command was successful.
        this.OutputTextBox.Text += $"\r\rResult = {commandResult}.\r\n\r\n";

        //Clear the input box.
        ((TextBox)sender).Text = string.Empty;

        //Scroll to the bottom so we can see what was just added:
        this.OutputTextBox.SelectionStart = this.OutputTextBox.Text.Length;
        this.OutputTextBox.ScrollToCaret();
    }
}
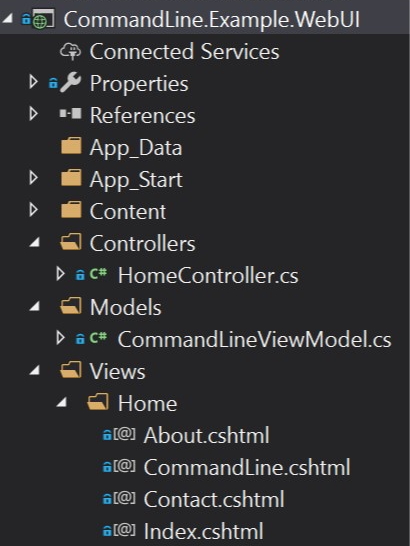
Command line interfaces can be utilized in web applications too.
Pictured to the left is the solution tree of a simple ASP.Net MVC
application that utilizes the CommandLine library to process user entered commands.
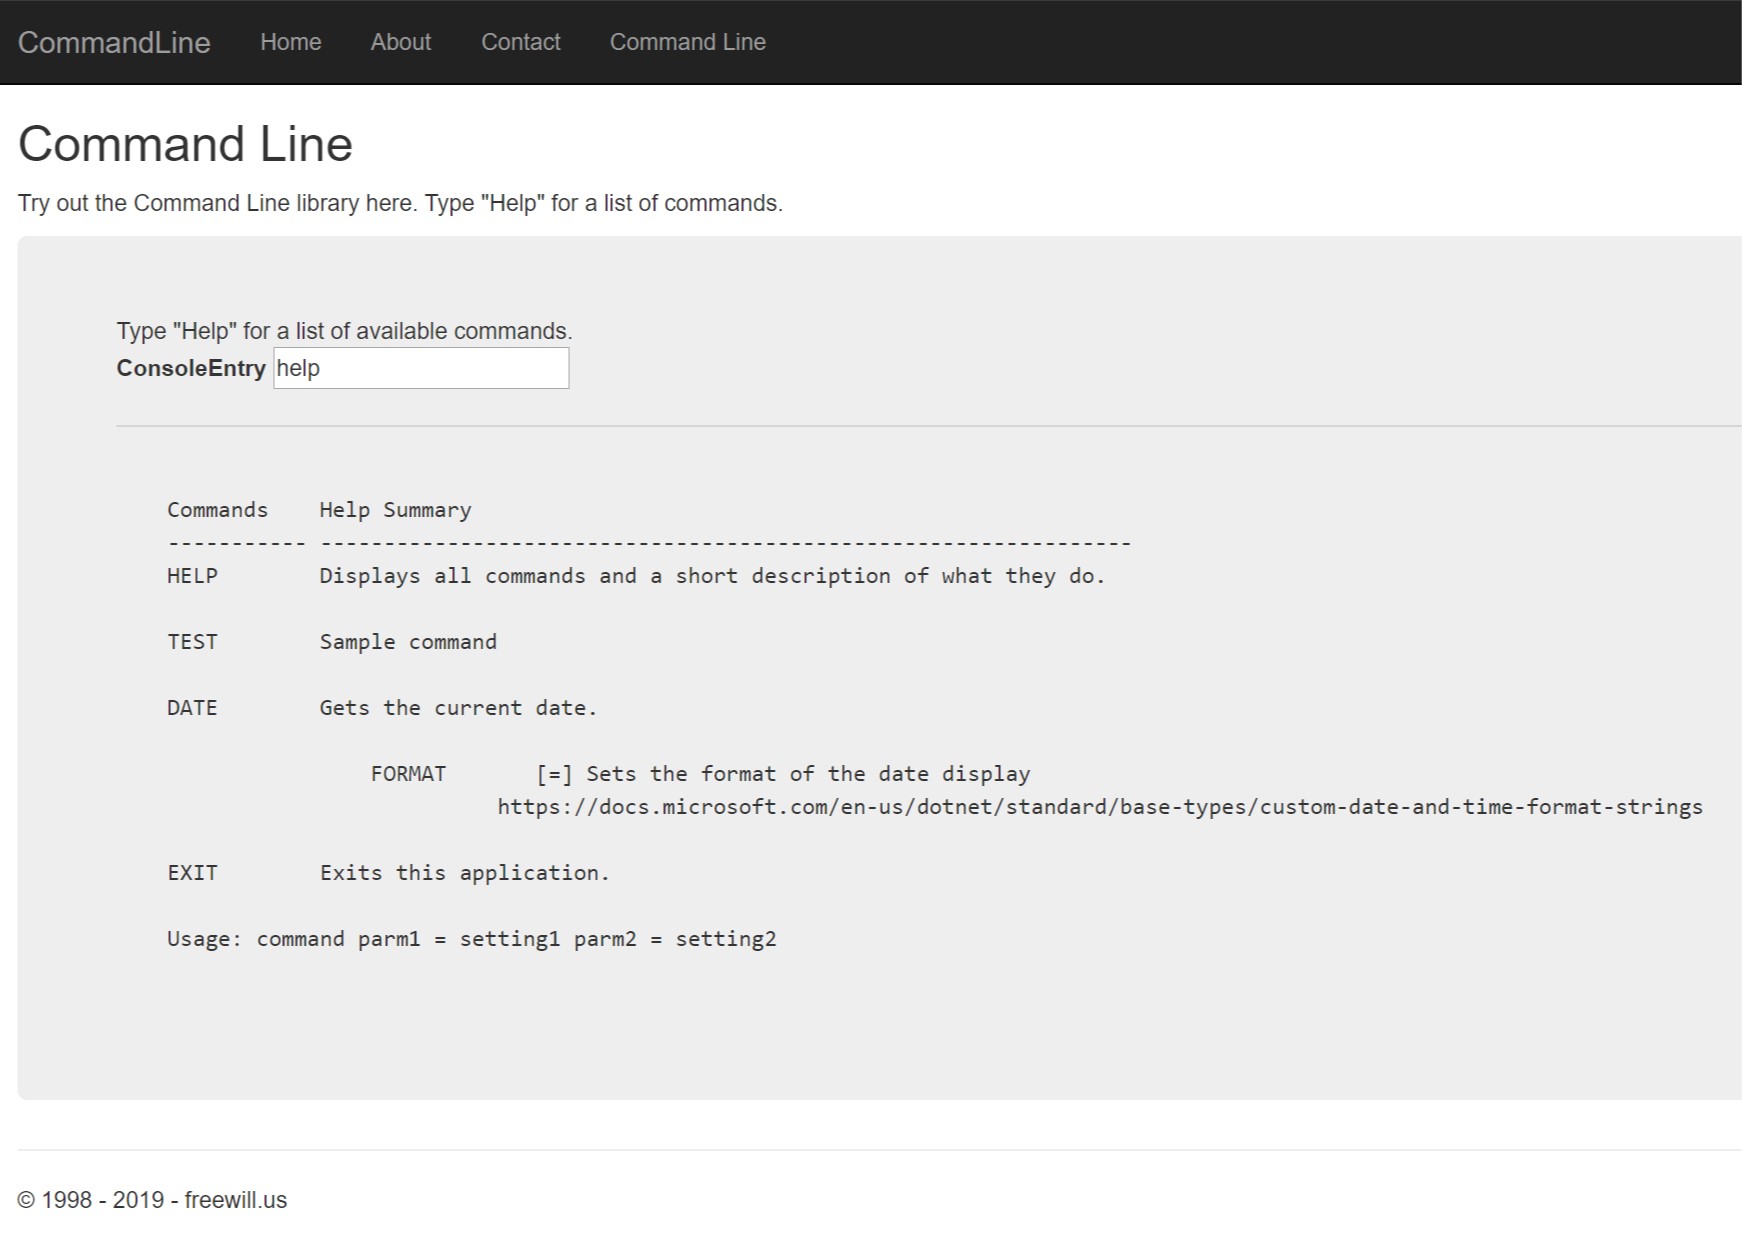
Pictured below is what the Web UI demo app page looks like. The user can enter commands in
the ConsoleEntry text entry. The results are redirected to the TextBox below it.
You can see that the user has already entered the "help" command, hit [Enter] and
the built-in help facility generated the help text.
How does the CommandLine object know how to output text onto a web page? It doesn't! All
ouput from the CommandLine is in a StreamWriter that YOU assign to it. You can hook into
your own StreamWriter to grab the text that the CommandLine object generates, then YOU can
direct it to wherever you like... whether it be Std Out in a Console app, a TextBox in a
WinForms app, a text file, or a web page. It's all up to you and totally in your control.
This sample solution is provided in the source code solution, as well as a Console demo app,
and even a WinForms demo app.
This is from the provided ASP.Net MVC application that demostrates how to use the CommandLine in
a web application.
The Index() method is just your standard MVC Index action.
public ActionResult Index()
{
    return View();
}
This is the action method to load the CommandLine view page.
public ActionResult CommandLine()
{
    ViewBag.Message = "Command Line";

    return View();
}
Instantiate the CommandLineType object and initialize it with a prompt.
private CL.CommandLineType _commandLine = new CL.CommandLineType("Example", ">");
When the user enters a command on the CommandLine page, it's sent to this action method.
Now's a good time to review the CommandLineViewModel:
public class CommandLineViewModel
{
    public string ConsoleEntry { get; set; }
    public string Output       { get; set; } = string.Empty;
}
Though the model is sent to this action method, this is not the handler for any particular command. Here is where the accepted user commands are created as command objects and their accepted parameters are added to the commands in the form of paramter objects.
[HttpPost]
public ActionResult CommandLine(CommandLineViewModel model)
{
    //The code below was copied from the WinForms sample project, with minor modifications...

    //Add a sample command to the command line object and point it to its event handler and give it some help text.
    var testCommand = new CL.CommandType(TestCommand_CommandFunction, "Test", "Sample command");
    this._commandLine.AddCommand(testCommand);

    //A date command with help and a format paramter object.
    var dateCommand = new CL.CommandType(DateCommand_CommandEventHandler, "Date", "Gets the current date.");
    var dateFormatParm = new CL.ParameterType(null, "Format", "=", "f", "Sets the format of the date display");
    dateFormatParm.ShortHelp.Add("https://docs.microsoft.com/en-us/dotnet/standard/base-types/custom-date-and-time-format-strings");
    dateCommand.ParameterList.Add(dateFormatParm);
    this._commandLine.AddCommand(dateCommand);

    //Since we're not using the Console, we need to trap the output so we can do something with it.
    //A StringWriter will work just fine for this purpose.
    //We'll capture the output via the _commandLine.OutputStream and put it in the ViewModel.
    this._commandLine.OutputStream = new StringWriter();

    //Notice there's no exit command?  That's not needed in a web UI app.
    //Whatever control is passing the input to the command line object can check for an exit command (if it wants to).
    //Also notice that we're NOT calling this._commandLine.Execute()?  Again, thats because we're NOT using an actual
    //Console app.  We're handling keyboard input from a standard Html.TextBoxFor() control from the view and CALLING
    //CommandLineType.ExecCommand() here and passing it the text from our input textbox, so there's no concept of
    //"exiting" the CommandLineType object.  However, we're going to respond to "exit" anyway and redirect them
    //to the Index action method to send them back to the home page.

    //Send the user entered command to the command line's ExecCommand() method to be processed.
    var commandResult = this._commandLine.ExecCommand(model.ConsoleEntry);

    //Check if the user entered whatever command triggered the exit event.
    switch (commandResult)
    {
        case CL.CommandResultEnum.Fail:
            model.Output += "Command not recognized.";
            break;
        case CL.CommandResultEnum.Exit:
            return RedirectToAction("Index", "Home");
    }

    //Capture the command's ouput and assign to the view model.
    model.Output += this._commandLine.OutputStream.ToString(); //.Replace(" ", " "); //.Replace(Environment.NewLine, "<br />"); ;

    //Reassign the OutputStream to a new StringWriter() (old one will not let go of old output).
    this._commandLine.OutputStream = new StringWriter();

    return View(model);
}
When a user enters a command, the CommandLine object parses it and triggers events in the appropriate
places. This method is an event handler that's fired when the user enters the date command. It
ensures the value the user entered a valid date formatter and displays the current date and time
in the format specified by the user.
Notice the output is sent to the command line object's OutputStream? That's important. Nothing
Web-like is hapenning in this event handler. This is 100% command line stuff. The output is
captured in the CommandLine action method above and displayed accordingly.
private bool DateCommand_CommandEventHandler(object sender)
{
    var command = (CL.CommandType)sender;

    var parm = command.GetParameterByName("Format"); //TODO: event handler not firing if user enters parameters.

    string display = "Unrecognized format specifier";
    try
    {
        display = DateTime.Now.ToString(parm.UserValue);
    }
    catch (Exception ex)
    {
        display = ex.Message;

    }

    _commandLine.OutputStream.WriteLine($"{display}");

    return true;
}
Again, zero web-like activity happens here. This is the event handler for the "Test" command. It's processed and output is sent to the CommandLine object's output stream.
/// <summary>
/// Event handler for the "test" command object.  It simply writes to the _commandLine.OutputStream.
/// The controller action will capture any text written to that stream and display it however it likes.
/// </summary>
/// <param name="sender">The command object that owns the comment that was processed.</param>
/// <returns>True for success, false for failure.</returns>
private bool TestCommand_CommandFunction(object sender)
{
    var command = (CL.CommandType)sender;

    //Write to the command line's output.
    _commandLine.OutputStream.WriteLine($"Test command executed [{command.ConsoleEntry}].");

    return true;
}
This is the only model used in the ASP.Net MVC sample application. When the user enters a command, their entry is stored in the ConsoleEntry field. Once the CommandLine object does its processing and writes its own output to its OutputStream, the MVC app grabs that output and redirects it to the CommandLineViewModel.Output field, where an action method uses that to display it on the web page.
public class CommandLineViewModel
{
    public string ConsoleEntry { get; set; }
    public string Output       { get; set; } = string.Empty;
}
This is the simple contents of the page that accepts the user entered commands and displays the output of those commands. There's nothing to it. It posts the user command to the Home controller's CommandLine action method.
<p>Try out the Command Line library here.  Type "Help" for a list of commands.</p>


@using (Html.BeginForm("CommandLine", "Home", FormMethod.Post, new { @class = "form-horizontal", role = "form" }))
{
    <div class="jumbotron">
        Type "Help" for a list of available commands.<br />
        @Html.LabelFor(m => m.ConsoleEntry)
        @Html.TextBoxFor(m => m.ConsoleEntry)
        <hr />

        @if (Model != null)
        {
            <tt style="white-space: pre;">@Model.Output</tt>
        }
    </div>
}

@section Scripts {
    @Scripts.Render("~/bundles/jqueryval")
}